How to compare a Figma design with your live website (pixel by pixel)
The design says 24px, your CSS says 24px, and the card still looks off. It's usually a font, a line height or a rounding somewhere. This guide goes through where builds drift from Figma, how to catch it by hand in the browser, and the faster way, with an overlay.
Updated 30 September 2026
Why builds drift from the design
Nobody ships a card 3px off on purpose. Figma and the browser just disagree on a lot of small things.
- Fonts. The web font loads late or not at all and a fallback takes its place. Or it's a different version of the font, with other metrics. Browsers on macOS and Windows also rasterise text differently, and so does Figma.
- Line height. Figma's "Auto" line height and CSS
line-height: normalboth depend on the font, and they rarely land on the same pixel. Text boxes shift by a few pixels, then everything below them does too. - Rounding. A 33.333% column, a frame at x = 120.5, a 1.5px border: the browser has to snap those to device pixels, and it doesn't always round the way the design tool did.
- rem and px.
1remis 16px only if the root font size is left alone.1.1remis 17.6px, not 18. Round a few of those and the whole page starts to creep. - Images.
object-fit, a different crop, an aspect ratio that isn't quite the same, or a 2x asset shown at the wrong size. - Viewport. The frame is 1440 wide, and so is your window, but a visible scrollbar eats some of that width. A centred layout then moves by half the scrollbar width. Also check browser zoom: at 90%, nothing will line up.
Checking by hand
You can do all of this without an extension. It works, it's just slow, and you redo it after every change.
Side by side
Figma on one screen, the browser on the other. It's fine for the big stuff: a missing section, the wrong colour, a button in the wrong place. It won't catch a 2px shift. Nobody's eyes are that good across two screens.
Screenshots at the same width
Open DevTools, switch on device mode, and set the width to the frame's width (1440, for example) and the device pixel ratio to 1. Then use the command menu (⌘⇧P or Ctrl+Shift+P) and run "Capture full size screenshot". Now you have a build image at the same scale as a 1x export of the design.
Onion skin in an image editor
Stack the design and the screenshot in any editor, Figma included. Set the top layer to 50% opacity and look for doubled edges, or set its blend mode to Difference: identical pixels turn black and only the differences stay visible. It's precise, but you redo the screenshot and the stacking every time the CSS changes.
DevTools measurements
Inspect an element and open the Computed tab: it shows the real box size, the font size, and the line height the browser actually used. At the bottom of that tab, "Rendered Fonts" tells you which font was really drawn, which is the fastest way to catch a fallback. Compare those numbers with Figma's inspect panel or Dev Mode.
Export the right frame from Figma
When an overlay won't line up, check the export before you touch the CSS.
- Export the frame, not a group. The frame's width is the viewport the designer drew for, so it's the width your page should be. Hide notes and annotations that sit inside the frame first.
- Mind 1x and 2x. For an overlay you want one image pixel per CSS pixel. A 2x export of a 1440 frame is 2880 pixels wide, so it has to be scaled to 50%.
- Copy as PNG (⇧⌘C on macOS, Ctrl+Shift+C on Windows) is the quickest route: no file, just the clipboard. Figma's help centre says it defaults to a 2x image, so expect to scale it down.
- Long pages are fine. Export the whole frame height. You line up the top, then scroll.
Overlay the Figma design on your website, step by step
Mockpup is a free Chrome extension that puts the design on top of the page you're building, on localhost, staging or production. It's the onion-skin method from above, without the screenshots.
1. Open the page at the frame's width
Resize the window or use DevTools device mode so the page is as wide as the Figma frame. When you add an image, Mockpup tells you its size and whether it matches your window, so you know before you start nudging.
2. Paste the frame
Press Alt+P to open the panel. In Figma, copy the frame, then paste it on the page. With a Figma personal access token connected, a frame copied with ⌘C or Ctrl+C lands at its exact size. Without one, use Copy as PNG and paste, then set the scale to 0.5 if it came in at 2x. Dropping an exported PNG, JPG, SVG or WebP works too.
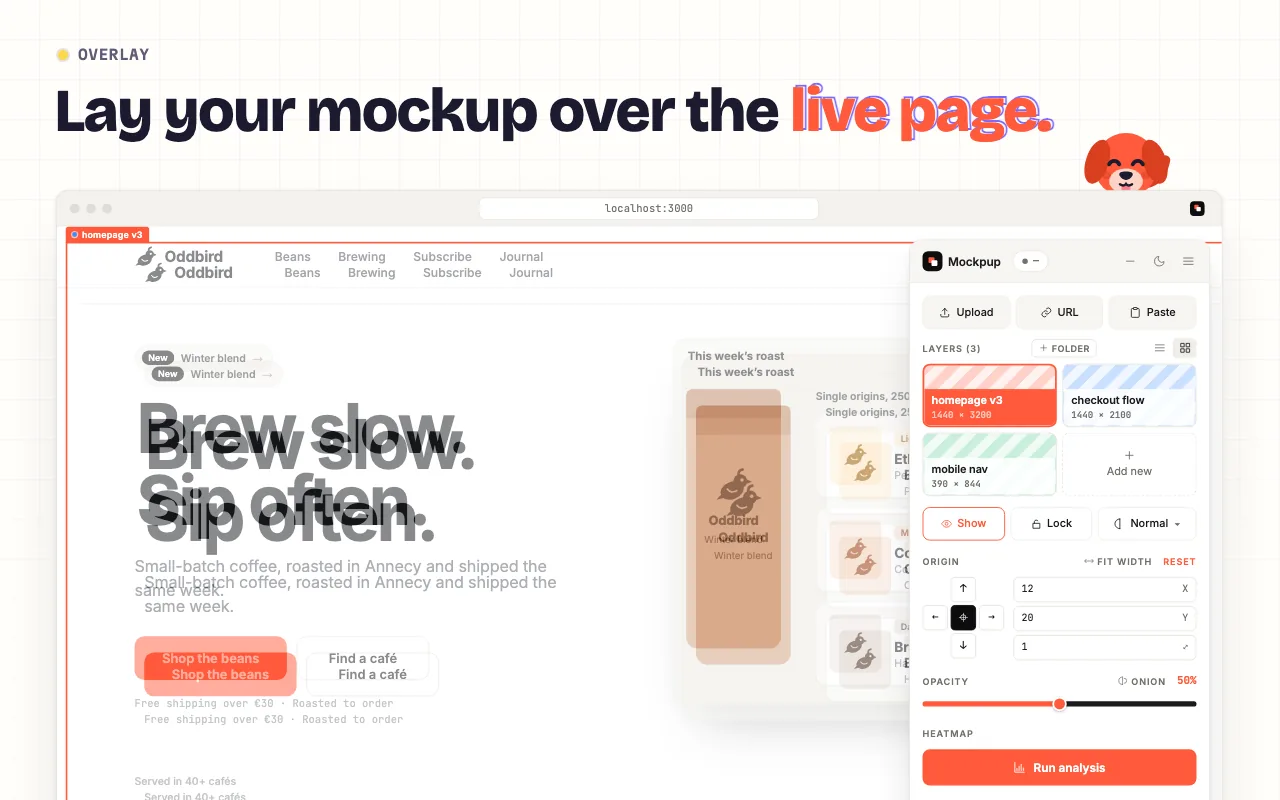
3. Line it up
Snap the layer to a corner, an edge or the centre in one click, then nudge it with the arrow keys: 1px at a time, 10px with Shift. "Fit width" stretches it to the viewport width. For a section further down that moves when content above it grows, pin the layer to that element so it follows the layout. Lock the layer when you want to click through it and inspect the page.
4. Turn on diff mode
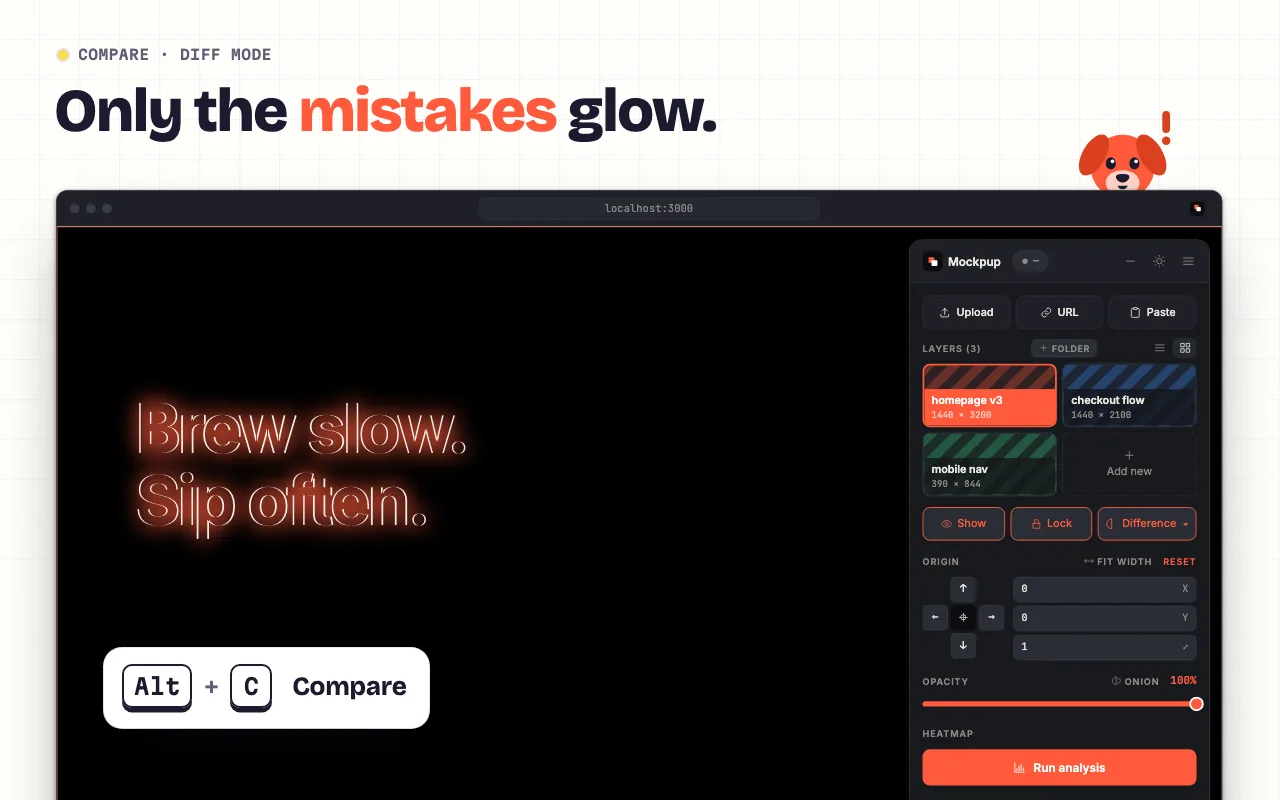
Press Alt+C for diff mode. Identical pixels go black and anything that differs lights up. It's the Difference blend from the onion-skin method, but on the live page.
- Thin doubled outline: the element is in the right style but in the wrong place, usually by a few pixels.
- Solid glowing block: a different size or a different colour.
- Soft fringe on text only: anti-aliasing and font rendering. Usually safe to ignore.
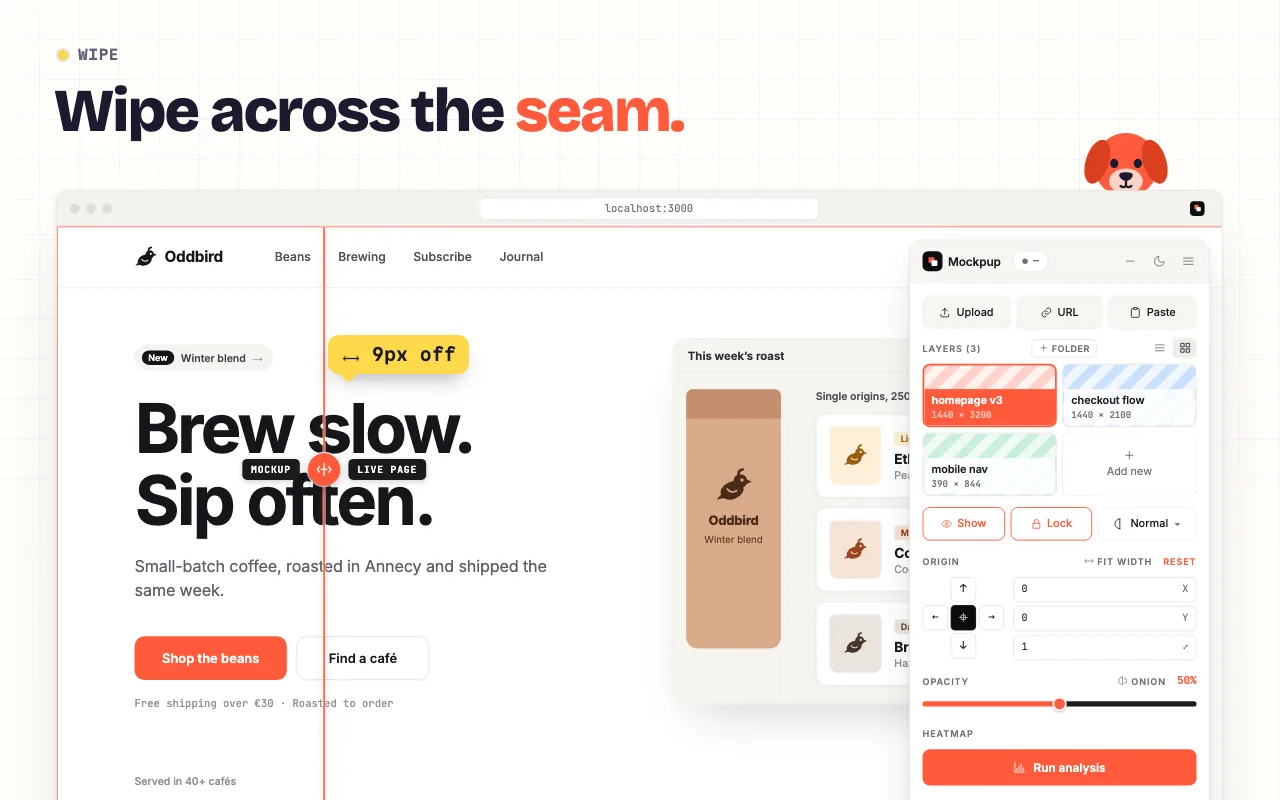
5. Wipe across the seam
Press W and drag the handle across the page: design on one side, build on the other. It's the best view for type, because you can see a baseline jump or letter spacing change right at the line.
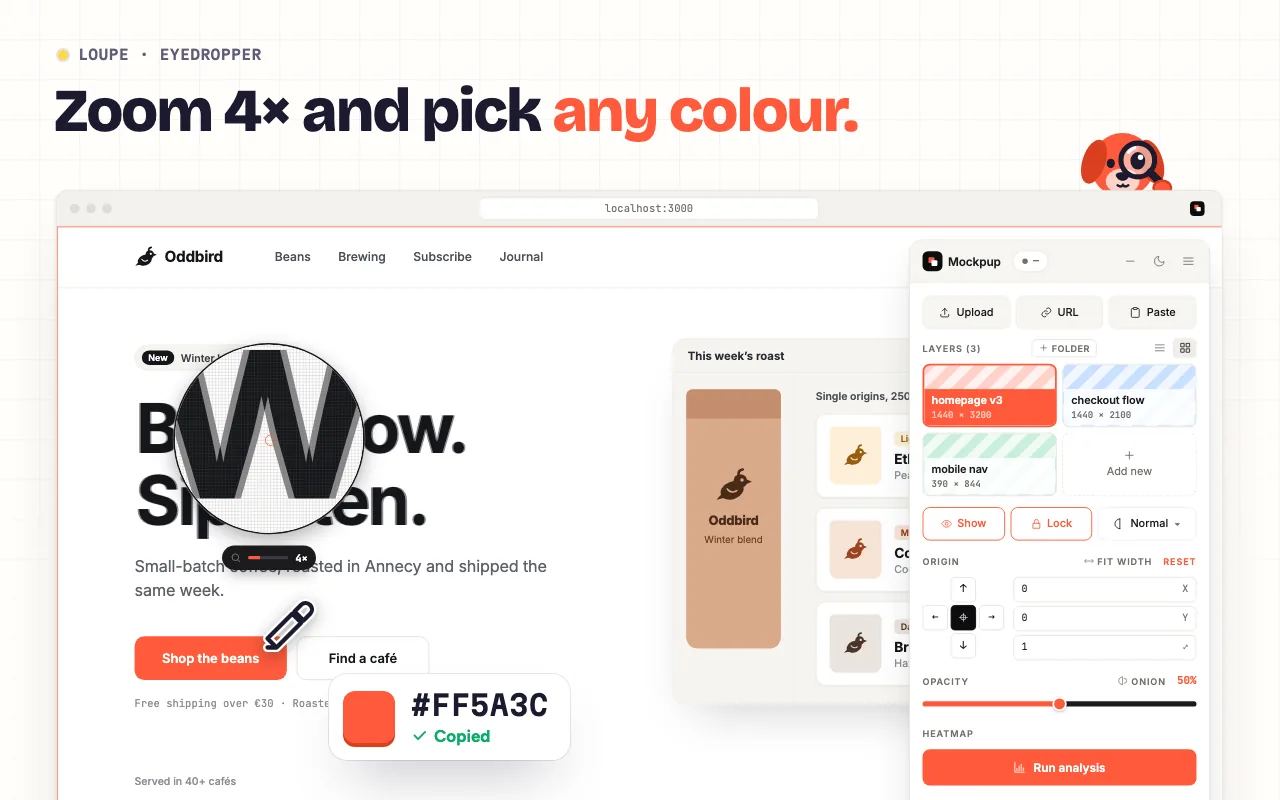
6. Loupe and eyedropper
Press Alt+L for the loupe: it starts at 4× and goes up to ×10, on the real pixels. Click with the eyedropper to copy a pixel's hex code, then check it against the fill in Figma. Good for 1px borders, text colour and "is that grey #6B7080 or #6B6F80?".
7. Get a score, then decide what "done" means
Click "Run analysis". Mockpup compares every pixel under the layer and gives you a match score, a heatmap and the three biggest problem zones; click a zone to jump to it. The tolerance switch (Strict, Normal, Loose) decides how different two pixels must be to count. Only the visible part of the layer is compared, so scroll and run it again for long pages.
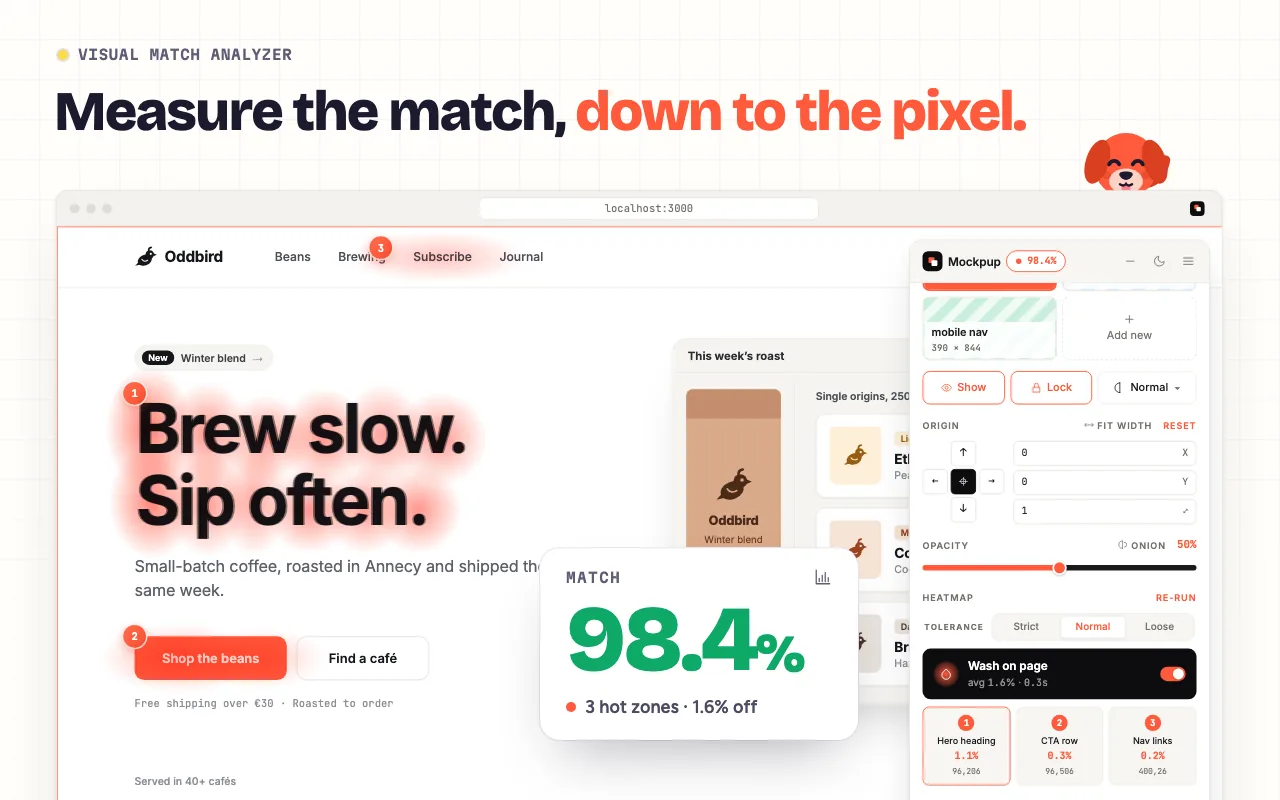
On a text-heavy page, viewed on a different OS from the designer's, font rendering alone will keep you under 100%. Agree on a tolerance with your designer, fix the hot zones, and paste the score in the PR.
Checklist
- The page's viewport, not the window, is exactly as wide as the Figma frame.
- Browser zoom is at 100%.
- The mockup is at 1x, or scaled to 0.5 if it was exported at 2x.
- Web fonts are loaded (DevTools, Computed, Rendered Fonts).
- The layer is anchored top-left, then nudged 1px at a time.
- Diff mode shows no doubled edges on headings, buttons and cards.
- Wipe across every heading to check baselines and letter spacing.
- Loupe and eyedropper on brand colours, borders and text colour.
- Repeat at every breakpoint you have a frame for: 390, 768, 1440.
- Run the analyzer and note the score in the pull request.
Try it on your own build.
Mockpup is free, with unlimited layers and no account. Your mockups stay in your browser.
Add to ChromeNot on the Chrome Web Store yet. Get one email on launch day.
FAQ
Why does my Figma export look twice as big on the page?
Figma's Copy as PNG defaults to a 2x image, and an overlay is placed at the image's real pixel size, so a 1440px frame arrives 2880px wide. Export at 1x, or set the layer's scale to 0.5.
Does the browser window have to match the Figma frame width?
The page's viewport does, not the window's outer width. A visible scrollbar takes part of the width, and a centred layout shifts by half of it. DevTools device mode gives you an exact width.
Can I compare a mobile design?
Yes. Open DevTools device mode at the frame's width, 390 for example, and overlay the mobile frame. Move or collapse the Mockpup panel to see the part you're checking.
Do I need a Figma token?
No. Copy as PNG or a regular export works without one. A personal access token only adds direct paste of a copied frame at its exact size, and each paste uses one render from your Figma API quota, which depends on your Figma plan and seat.
Is a 100% match realistic?
Close to it, on flat UI with the same fonts. Text is where it slips: a different OS or font version almost never gives you 100%, so settle on a tolerance with your designer.
Coming from another overlay tool? Here's how Mockpup compares with PerfectPixel.